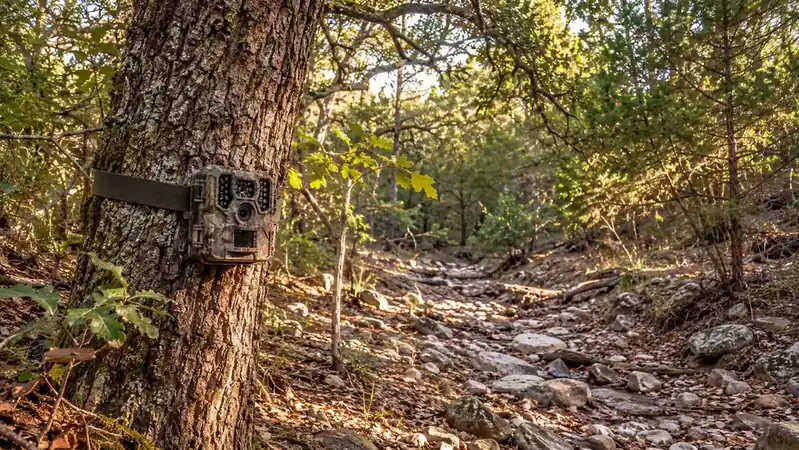
I strapped a trail camera to a live oak behind my house outside Kerrville because I wanted to know what crossed the dry creek bed after dark. I had a list of guesses and no proof. The first week of pictures was grass blowing in the wind, one very confused armadillo, and about four hundred frames of nothing at all. By the second week I had moved the camera twice and changed three settings, and the pictures started looking like the thing I had been imagining. The camera is a GardePro A3S, non-cellular and no Wi-Fi, and it has stayed on that same tree ever since.
Here is what I wish someone had told me at the start. A trail camera is not a security camera and it is not a phone. It sits in one place, it watches a slice of ground about as wide as your arms can spread, and it wakes up when something moves across it. Almost everything that goes wrong in the first month is a placement problem and not a camera problem. Get the placement right and the rest is a five minute menu and a walk out to the tree once a week.
The camera that found my fox in two weeks
Non-cellular means no monthly bill and no signal to chase. Battery powered, no-glow at night, and a card I pull on my morning walk.
Amazon Check Today's Price on Amazon →Step 1: Find the crossing before you find the camera setting
Walk your land at dusk with a flashlight and look for what the animals already use. A worn strip in the grass, a low gap under a fence, a scuff of clawed dirt at the base of a tree, droppings on a flat rock. Animals are creatures of habit and they reuse the same routes for years. A camera does not create wildlife traffic. It only reports on traffic that was already there.
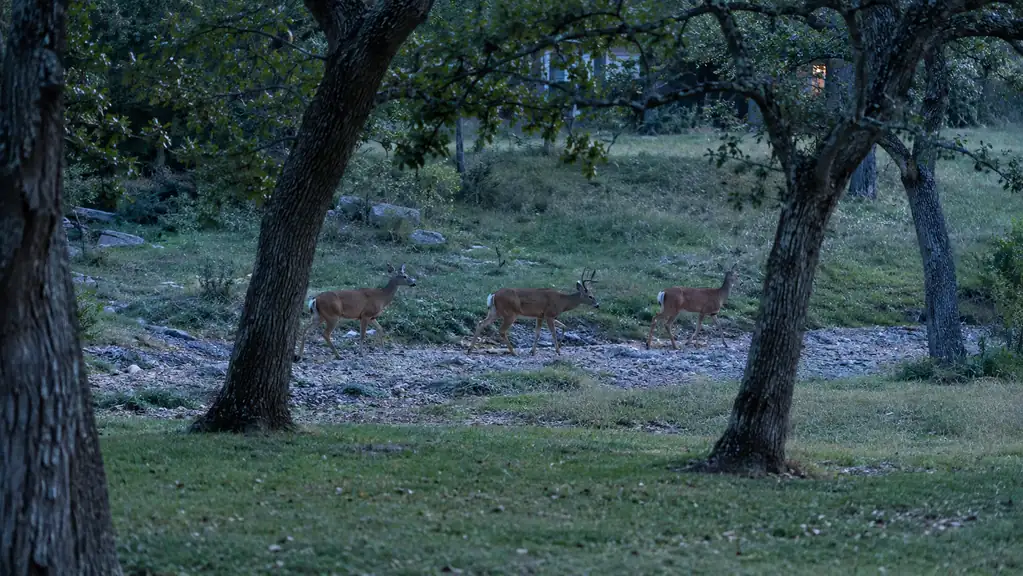
On my four acres the route is the dry creek bed itself. It runs behind the house and the deer and turkeys use the shallow part of it the way you would use a sidewalk. The crossing is a gravel gap about six feet wide where the bank drops to maybe ten inches, and that gap is the entire reason the camera works. I am not watching four acres. I am watching six feet of it, and everything moving along that creek has to come through those six feet. When you find your spot, measure it the same way: how wide is the pinch point, and can you see the whole width of it from a tree.
Decide what you are hoping to see before you set anything up, and write it down. If it is deer and turkeys, you want an open view across the trail. If it is the small night traffic, foxes, armadillos, raccoons, a tighter spot next to cover is better. Writing it down keeps you from chasing every new idea and ending up with a camera pointed at nothing in particular.
Step 2: Mount it at the height of the animal, not the height of your eye
Mount the camera at roughly the chest height of the animal you are after, or a little above it. For deer that is about waist to chest height on a person. For armadillos and foxes it is lower, close to knee height, and this is the mistake I made first. A camera aimed over their heads catches empty ground and the top of a cedar.
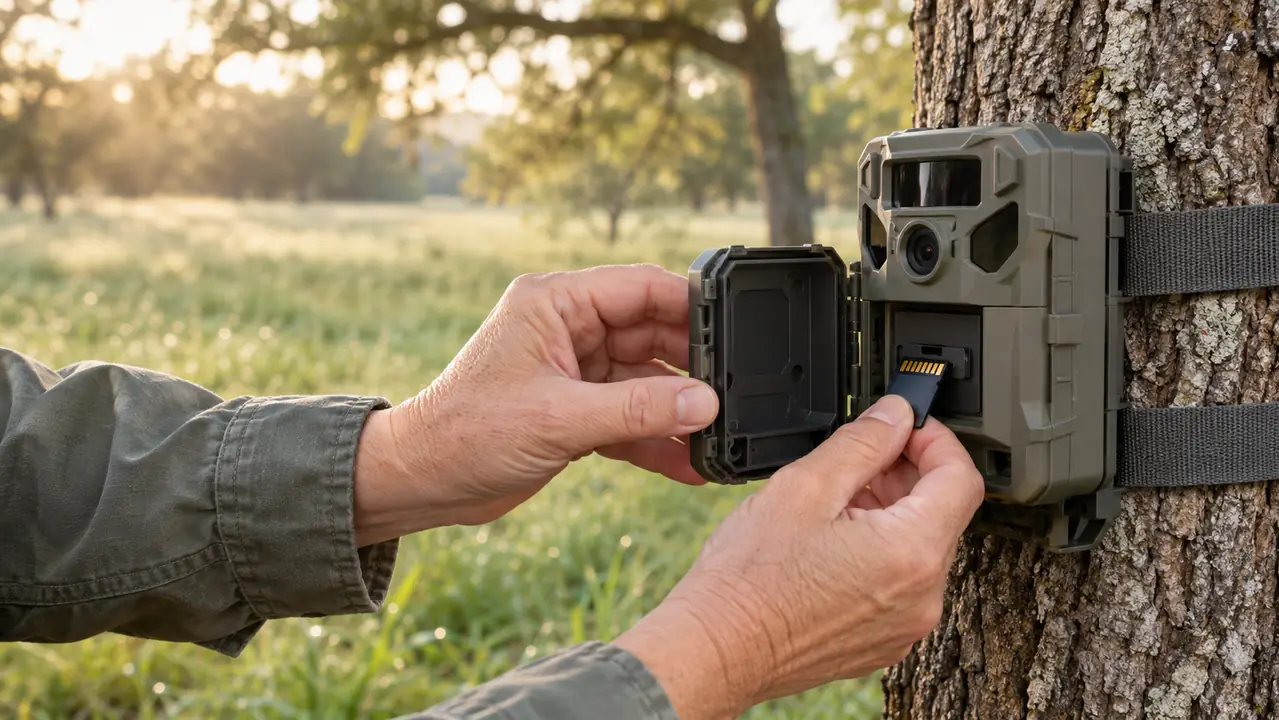
Use a tree rather than a post whenever you can. A tree does not sway in a Texas thunderstorm the way a thin post does, and a swaying camera means blurred frames and false triggers from every branch that moves. Strap it snug, then press the housing with the flat of your palm. If it rocks at all, tighten it and try again. Twenty seconds of that saves a week of tilted pictures. I run the strap about a hand's width above the housing and another hand's width below it, so the camera cannot rotate on the trunk, and I check the tension every time I swap the card, because a strap that was tight in October has a way of loosening by February.
Be honest with yourself about the sun while you are picking the tree. Point the camera north or south if the view allows it. A lens facing east gets a sunrise straight into it, and one facing west gets the same at sunset, and both will burn out a chunk of your day. I learned that one from a week of white rectangles at seven in the morning. If the only decent tree faces the wrong way, cheat the aim a few degrees off the trail instead of fighting the light. You lose a sliver of the crossing and you keep the rest of the frame clean.
Step 3: Set the menu at the kitchen table, then leave it alone
The menu on the GardePro A3S is a set of push buttons, and once it is set you should not need to touch it again. Do it indoors in daylight, at the kitchen table, not crouched in the dark with a flashlight in your teeth.
Set the date and time first. This sounds trivial and it is not. Everything you learn later depends on knowing when the fox came through relative to the weather, the moon, or the hour the porch light went off. Then choose what to capture. The A3S records 1296P HD video with sound, which is what I use, because a twenty second clip of a turkey deciding whether to cross tells you more than a still frame does. If you want both, the hybrid mode takes a picture and then a clip.
Time-lapse is the setting people forget about. It fires on a schedule instead of on motion, which is how you catch the slow things: a new trail wearing in, a fence line the deer are testing, weather coming over the ridge. I run it for a day or two when I am curious about a spot rather than about a particular animal. The night side needs no fiddling. The no-glow illumination is why nothing gets spooked, and the Sony Starvis sensor is what keeps the dark frames from being a black rectangle.
Step 4: Aim it and walk the test yourself
Loosen the strap, sight along the top of the housing, and point the lens at the middle of the trail rather than at the horizon. A camera aimed level at forty feet of open ground catches a lot of sky and not much animal. You want the trail crossing the frame, not sitting at the bottom edge of it.
Then walk the test. Turn it on, walk away, and cross the trail exactly where you expect the deer to cross. Walk, do not run. If it catches you, it will catch them. Do it twice, once at a normal pace and once slowly, because a slow armadillo is a different problem from a trotting deer. Wear the boots you actually go outside in, since your stride puts your hip at about the height of a deer's shoulder. Then pull the card and look at what you got.
If you got a clean frame of yourself at the crossing, you are finished. If you got a picture of your own shoulder, or a picture of nothing, adjust and walk it again. This is the step people skip and then blame the camera for. The camera was doing its job the whole time. It was aimed at the gap six feet to the left of where the animals actually move. A two inch drop in mounting height moves the frame more than you would expect at fifteen feet, so re-walk the test after every adjustment, even the small ones.
Step 5: Build a card and battery routine you will keep
A non-cellular camera does not send anything anywhere. That is the trade. There is no monthly bill and no signal to worry about, and the cost of that is a walk. I go out about once a week with a fresh card and a spare set of batteries in my jacket pocket, usually with my coffee.
Pull the card, put in the fresh one, and carry the used one to the laptop. Do not delete anything until you have looked at it. I keep one folder per month and dump everything in without sorting on the first pass. The good frames are obvious on the second. I also keep two cards and label their cases A and B with a strip of masking tape, and I always put the fresh one in and the used one in my pocket in that order. The one week I did it the other way around, I sat down at the laptop and spent a while looking at the same fox twice before it dawned on me. Wipe the lens with your shirt while you are out there too, because a week of Hill Country dust on the glass softens every picture you get.
Batteries are the other half of the routine. The A3S runs on battery power, and it can also run from a solar panel if you add one, though that panel is sold separately and I have never bothered with it. In cool weather I check them more often. If the night frames start going dark earlier than they should, that is almost always a battery question rather than a camera question. Change them and the pictures come back.
What Else Helps
Keep a small notebook in the same pocket as the spare card. I write the date, the weather, and anything odd I saw on the walk out. Two lines is plenty. A month later, when you are looking at a picture of a fox at four in the morning, the note that says it rained all evening is worth more than you would think.
Pair the camera with binoculars for the daytime shift. The trail camera is for the hours you are asleep and the angles you cannot see from the porch. Everything between breakfast and dark is still binocular work, and the two habits feed each other. Half the reason I check a card is to confirm something I watched at dusk and could not identify.
Leave the ground alone. Do not rake the trail clear, do not move the brush, do not set out food to improve your odds. A camera on ground that animals already trust will outshoot a baited setup every time, and you will be watching behavior that is actually natural instead of a crowd at a plate. Keep it on your own land, keep it off your neighbor's fence line, and keep it pointed away from the house.
One last thing. Give a new spot two weeks before you judge it. Wildlife runs on a slower schedule than we do, and a camera that looks quiet on day three is often busy by day ten. My fox showed up in the first two weeks on a tree I nearly moved on day four.
Two weeks after I strapped the GardePro to that oak, I had a picture of a gray fox on the creek bed. I had lived here for years and never once seen it.
One tree, one camera, one walk a week
No subscription, no signal to chase. The GardePro A3S waits on the tree and tells you the truth about what uses your land after dark.
Amazon Check Today's Price on Amazon →